|
The Knights of Ni 2024
CenterStage Off-season Documentation
|
|
The Knights of Ni 2024
CenterStage Off-season Documentation
|
Welcome to the software team! We’re glad to have you here.
This tutorial will help you download, install, and set up the software tools needed to the help contribute to the 5206 codebase. One of our core values is inclusivity, so we want to make sure that anyone regardless of experience feels ready to participate. Therefore, we’ve split this guide into two sections.
The first section describes how to install graphical (GUI) versions of all the apps needed. Most new members will find this process easiest to follow and most convenient because it avoids the use of a terminal, which is a way to issue text-based commands to control a computer. Although the terminal is a widely useful tool that is used by programmers around the world, it is not necessary to use to participate in our team.
If you are already comfortable with the terminal, the second section describes how to install all necessary programs, centering around terminal-based applications when possible. Make sure to follow the instructions for your specific operating system, as the methods used might change depending on that.
During the software onboarding process, we will help you install two tools. The first is an Integrated Development Environment (IDE), which is a program that is used to write, debug, and deploy code. The IDE we’ll be using is called Android Studio, although you are free to choose another IDE if you’re already comfortable using one. The second tool is a program called Git, which is a Version Control Software (VCS) that we use to keep track of each member’s changes to the code. Throughout the instructions, we’ll provide several links to outside articles explaining how each of the tools we install work. We highly recommend that you carefully read each article, as the concepts explained there are fundamental to the operation of our team.
If you have any questions at all during the onboarding process, don’t hesitate to contact Ashwin, Alessandro, or Ethan on Slack.
Sign-up link:
GitHub is an internet hosting service that allows programmers to store, manage, track and control their code using Git. Effectively, it lets you store code online in an easier way that allows many people to collaborate. We host all our code in an "organization" called "The-Knights-of-Ni" (https://github.com/The-Knights-of-Ni/).
Optionally, you can install GitHub Desktop to simplify using git from the website. Terminal users can use brew install --cask github on macs, or winget install -e --id GitHub.GitHubDesktop on windows.
To install git visit https://git-scm.com/downloads.
Git is a Version Control System (VCS) that is used keep everyone’s version of the code up to date. Here is a basic Git tutorial that should help get you started. https://www.vogella.com/tutorials/Git/article.html is a more in-depth tutorial. For those more technically inclined, Git has official documentation.
Android Studio, our main IDE: https://developer.android.com/studio/
Extra Setup Instructions: https://developer.android.com/studio/install
If you prefer a different IDE, IntelliJ IDEA is a good alternative: https://www.jetbrains.com/idea/
Extra Setup Instructions: https://www.jetbrains.com/help/idea/installation-guide.html
An IDE, or Integrated Development Environment, is an app that lets programmers code on a single interface. Basically, IDEs let you do all your coding in one space with features to streamline the process as much as possible. We use Android Studio because it is a base Java IDE that comes with all of the necessary additions to deploy code onto the robot.
IntellJ Ultimate is a turbo charged version of Android studio with more features, but it requires you to complete the application process, which may have to be manually validated by JetBrains.
Please follow the following instructions to install Android Studio and Git using the command line. We’ve provided separate instructions for Windows and Mac users, so make sure to follow the instructions for your specific operating system. Before we begin, make sure to read this warning.
With that warning out of the way, let’s get started installing the software needed for our system.
To install the necessary software on Windows, we will first install a package manager called winget. A package manager is a tool that automates the download and installation of other pieces of software, and is generally safer and easier to use than .exe files because each program is published to a trusted repository. Most modern Windows 10/11 systems should come with winget already installed. To check whether this is the case, open the Command Prompt by hitting Win+R and typing cmd at the prompt. Once you’re there, type the following command and hit Enter:
The entire thing should look like this:
If you see an output that is similar to this, winget is ready to go. If you see something that looks like this:
C:\Users\[your username here]>winget
'winget' is not recognized as an internal or external command,
operable program or batch file.

C:\Users\[your username here]>
Then install winget by installing the App Installer program, then close and reopen Command Prompt and try the above command again.
Next, issue the following commands using winget in the command prompt (hit Enter after each line):
Alternative command for IntelliJ IDEA
If you would like to install IntelliJ IDEA, Visual Studio Code, or another IDE instead of Android Studio, use this website to search for the relevant command, or download them from the official website directly.
Once you are done, setup Android Studio.
Open the app called “Terminal”
Next type (or paste) the following into the terminal:
If it says brew is not installed, you need to install brew. To install brew type:
Next paste this text:
Now setup Android Studio.
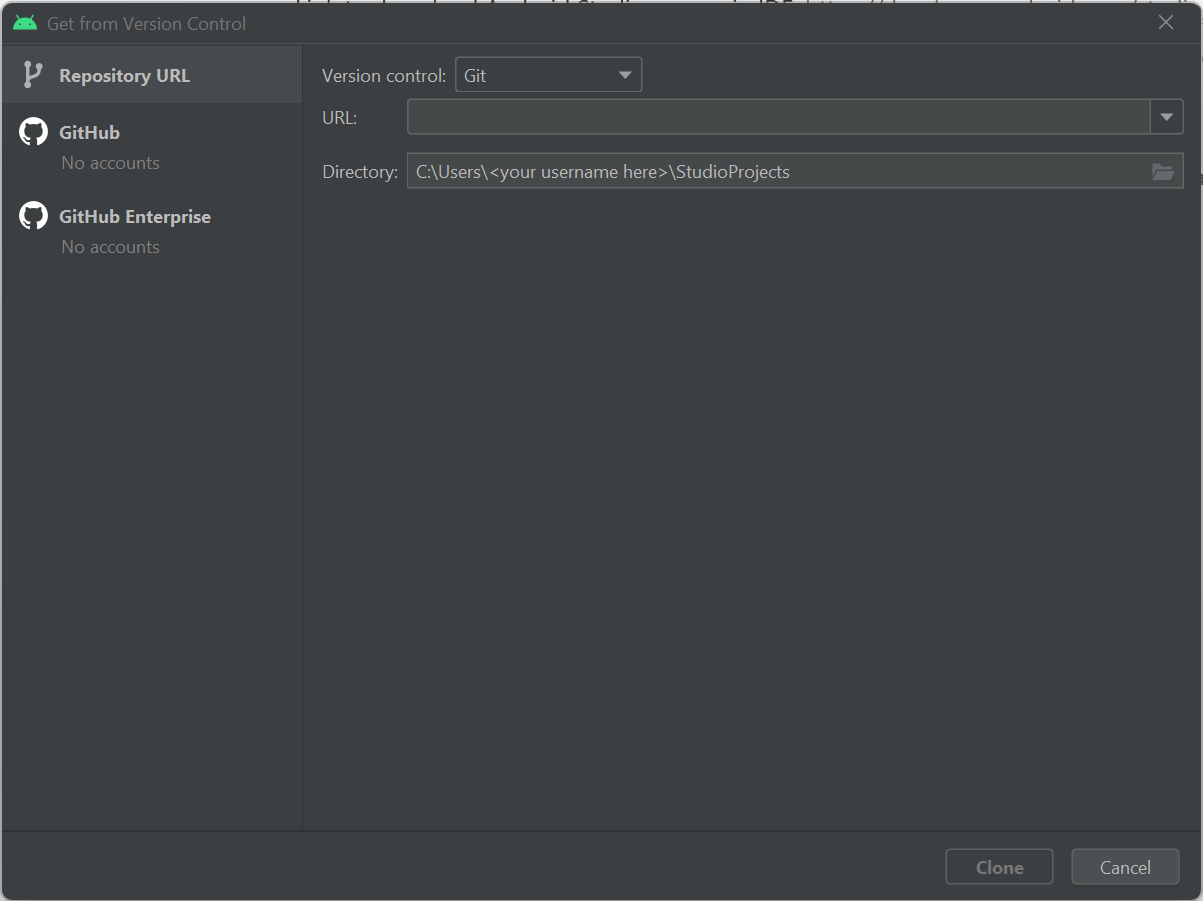
Use https://github.com/The-Knights-of-Ni/CenterStage.git for the url.
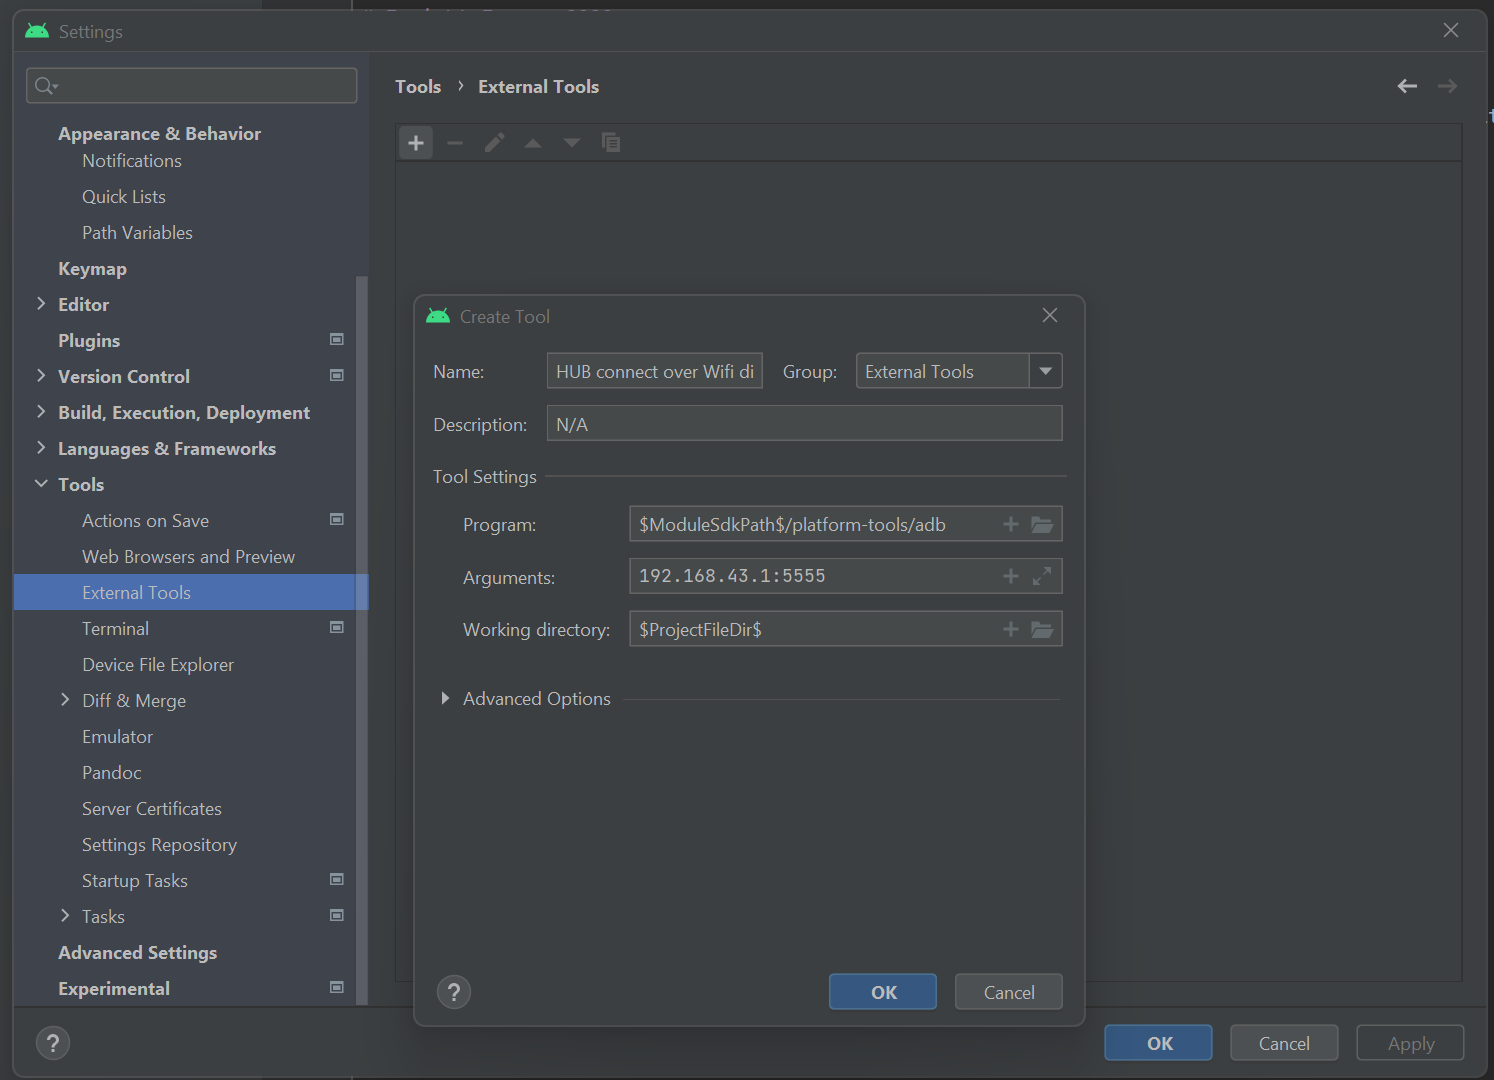
Go to your Android Studio settings (File>Settings), go to Tools>External Tools click the plus button, then fill it out with this:
Windows:
Other (Mac, Linux, *nix):
Then click done.
New UI. Restart the IDE when prompted.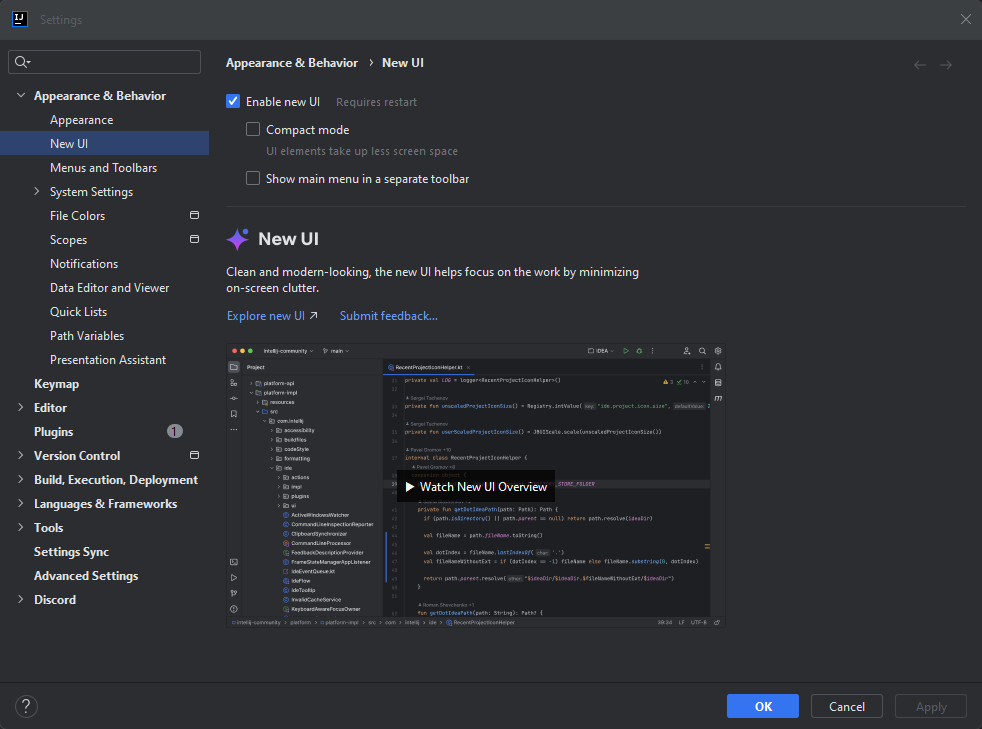
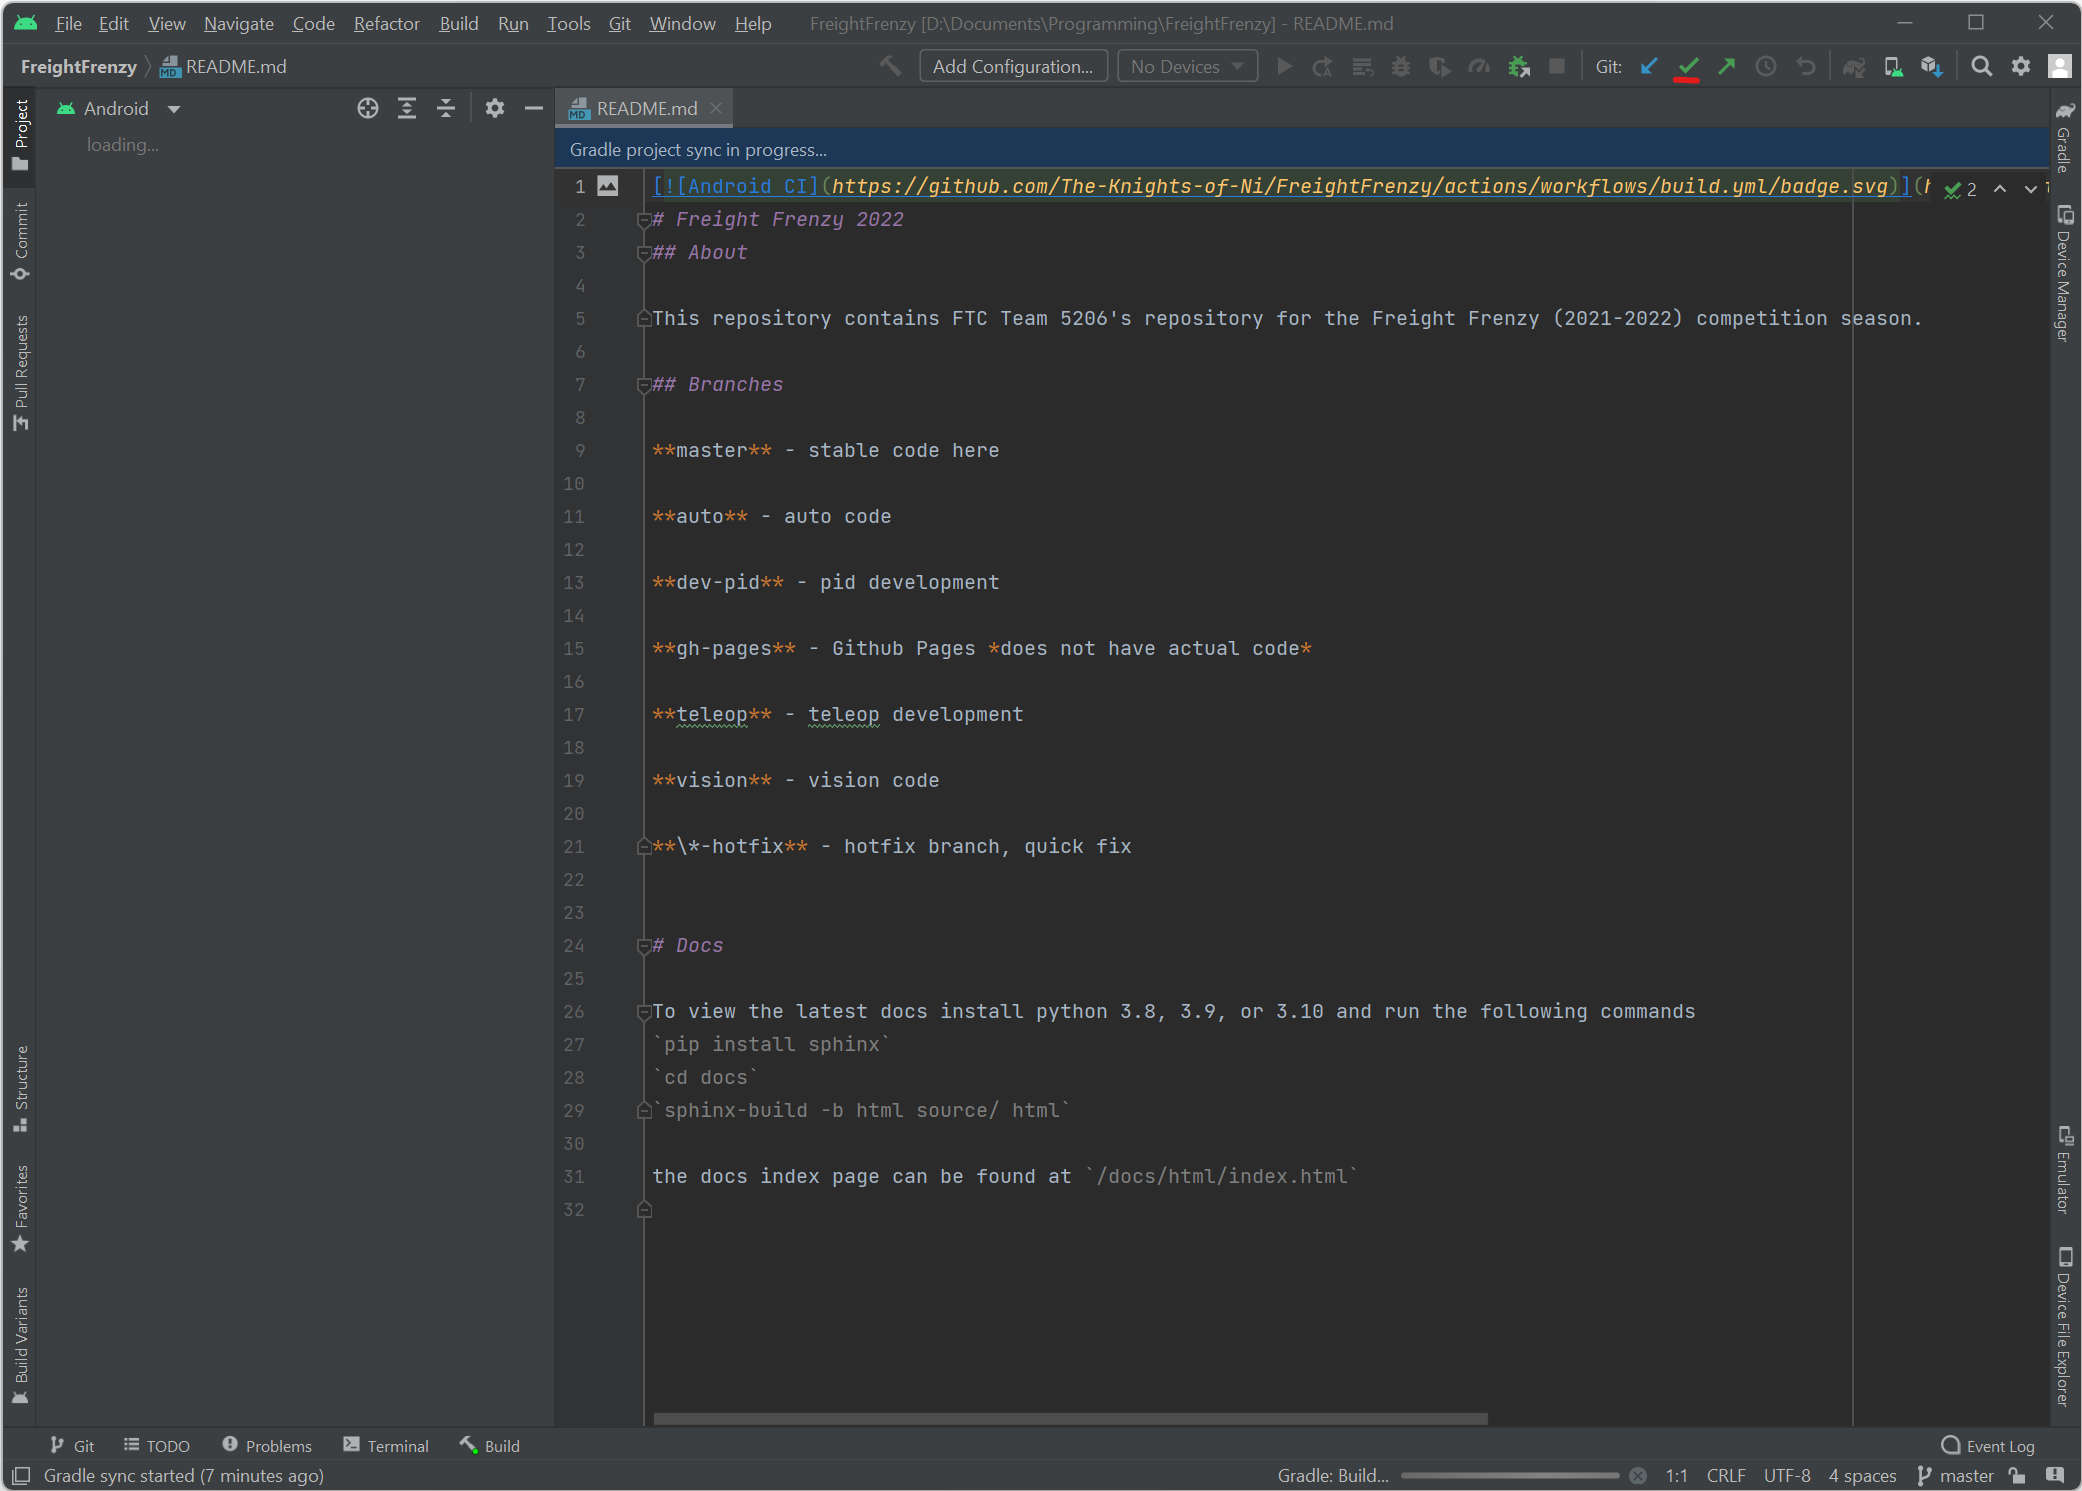
Make the appropriate changes to the code and then click the green check mark on the top right hand side of your screen to commit the changes.
Next write a message accurately summarizing the changes you have made to the code so that others can check at a glance what you did.
Finally click “Commit and Push” and use the default options.
Make the appropriate changes to the code and then open your terminal in Android Studio/IntelliJ IDEA.

Next, with YOUR_COMMIT_MESSAGE being an accurate description of the changes you made to the code, type the commands
git commit -a -m "YOUR_COMMIT_MESSAGE"
git push